Friday, July 26, 2013

Start Working Out!

So yesterday it was 5 weeks since my Little Mike came into the world.  We are so please and he is developing leaps and bounds.  He is showing signs of smiling and it is wonderful.  We celebrated his christening at our Lutheran Church a few weeks ago.


And as always here were the cakes!


And my little Will's 2nd birthday cake

 
But now that my cake is over, I have to concentrate on getting my body in better shape.  This has nothing to do with loosing weight really, more about toning up.  I am 40 lbs heavier than when I was married 7 years ago, never ever go on the birth control shot.  So I am starting to work out as much as I can.  Today we started simple and did some stretching yoga.  I am under no thought process that I can do an intensity workout, but I want to work my way up to them.  So today I did a simple yoga and stretch on my Comcast On Demand.  After 24 minutes I was feeling the burn.  I wanted to know where I was loosing weight so I made up a simple Workout / Fat Loss / Tone Up Log.  You can download the pdf here .  Take your measurements and weigh yourself.  And let us tone up together!

Monday, July 8, 2013

Baby Has Arrived!

So, my newest little one arrived on June 20th, 2013.  It was a boy, I was so suprised and happy, he was happy and healthy.  He weighed in at 8 lbs 7.5 ozs and was born at 3:25 in the morning.

Here is my little guy close up.
So this week is his baptism and I will be baking cakes and making cookies until my hands fall off.  Stay tuned for more information.

But I will let you in on a little secret, I am starting to cheat at my cakes.  I am using box cake mix!  Ohhh no!!!  Not extactly.  Instead of following the directions I am using the box mix, the correct amount of water and instead of oil, melting the equal amount of butter.  I also add an extra egg, it makes for a wonderful cake, with alot less work.

Check up on the blog this week, because there is lots of work to be done, and lots to blog about!

Tuesday, June 11, 2013

Dear new moms...

So, as of today, there is still no new addition to our family.  Not to be discouraged my hubby took me to the mall to walk.  After our usual once around we found ourselves in Boscovs.  Now I had a feeling to check the purses and we found the most perfect diaper bag.

Now I have nothing against diaper bags that you can purchase at the major box stores but more than likely you will buy something like this
But after one year of use your diaper bag will look like this.
But what is a diaper bag essentially, it is something that you can put into your car that has a wide enough base to accommodate a can of formula, two bottles, a bottle of water, four or five diapers (or one or two for short trips) wipes and a changing pad.

So why does this item that seemingly all moms must have be so... loud.  This being our third child on my registry I selected 2 diaper bags, both for about $100 each, they were ohh so stylish and adorable, then came the angry calls from my family.  Why should I have such a nice diaper bag?  Why can't I have just the regular kind that you can buy in a store?

My question back would be, why can't I have a nice diaper bag?  And to that they would have no answer.  So as my wonderful dear husband was having me walk the mall to start up some labor contractions, we ventured into Boscovs.  I wanted to have a look at the purses and saw one that had what looked like bottle carriers.
We tend to use taller and wider bottles, so this particular purse here was not a good fit.  But it got me looking, what else would they have that could be good for a diaper bag.  Instantly my husband and I found one, all leather, nice high and wide sides and deep enough to carry our regular diaper bag items.  London Fog ended up being the brand here.
We are really excited about this diaper bag and it is a high enough quality that it will stand up to the year or so of use and abuse that diaper bags tend to go through.

Remember, just because we are moms doesn't mean we have to have... loud items.  Proud haute momma here.


Monday, June 10, 2013

Contraction Cupcakes

Contraction Cupcakes

This is a short post for everyone, I am writing in between contractions.  I started these contraction cupcakes earlier today, not realizing it really might actually do the trick.  These are Red Raspberry Leaf Tea Cupcakes with a pineapple on the bottom and Lemon Drop Icing.

Here is how to make the cupcakes:

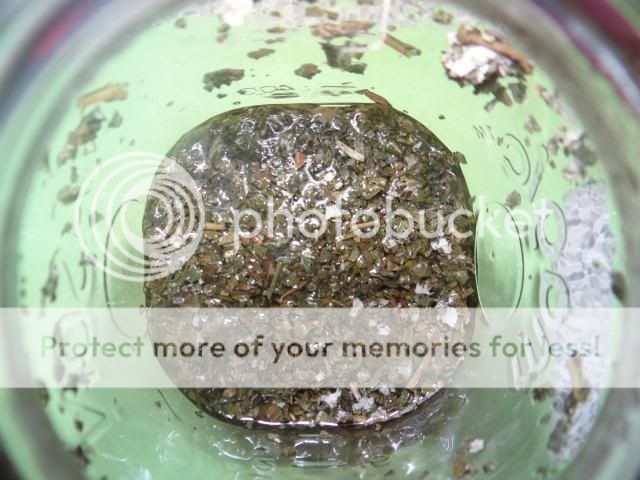
First brew a cup (9 oz) of 2x strength red raspberry leaf tea. Let sit for about an hour or more to really brew together.

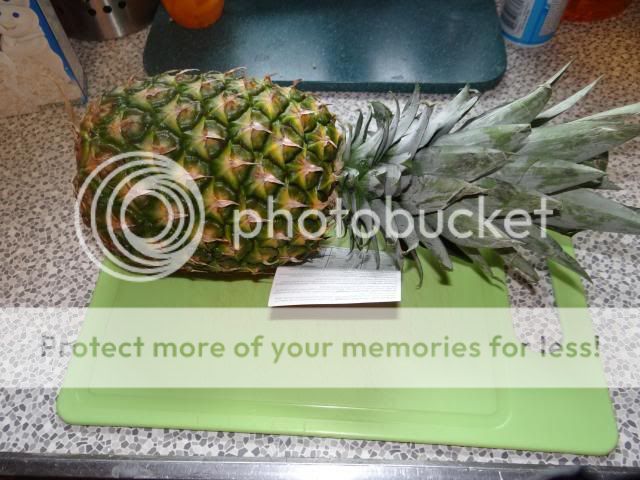
Take a pineapple, and cut the top and bottom off.


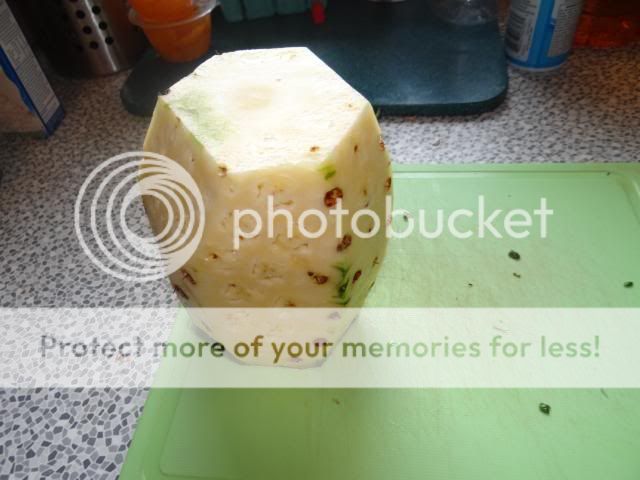
Cut off the outer skin.

Cut the pineapple into thin-ish slices, about the thickness of a two quarters.


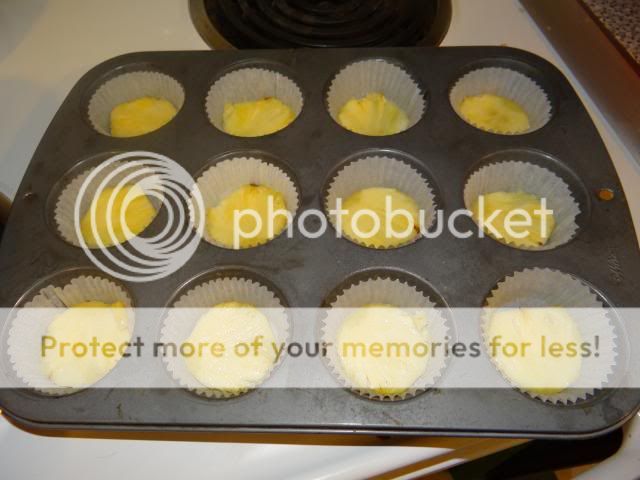
I used my canning funnel, but cut circles out of edges of the pineapple, don't worry if you get some of the core in there, it will not matter.


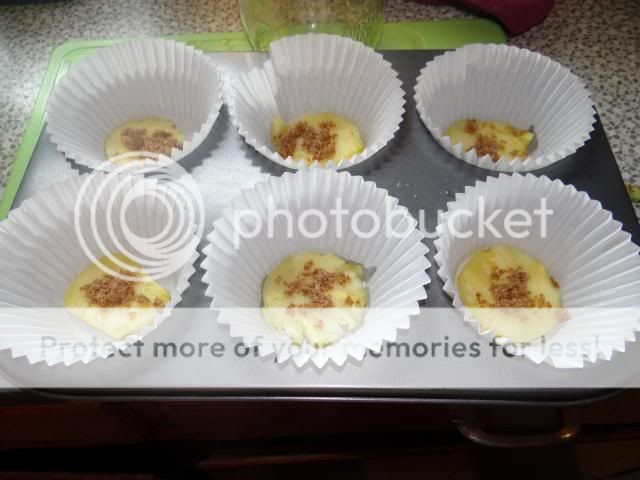
Place the precut circles into a lined cupcake pan.

 Using Dark Brown Sugar sprinkle a bit on the pineapples in the cupcake pan.


Mix together the batter for the cupcakes now...
Set 1 stick butter in saucepan on low heat on stove to melt.

Using a funnel, and a coffee filter, drain out the tea leaves from the tea.

Put the entire bag of white cake mix.

Add 4 eggs.

Once butter is done melting down SLOWLY add it to the batch.

Once the butter and everything is very mixed together, add it to the cupcake liners.

Bake in a preheated oven of 350 degrees for 20 minutes for standard cupcake size.

 Once they are cool enough to handle place in fridge to get colder.

Let us make the frosting now...
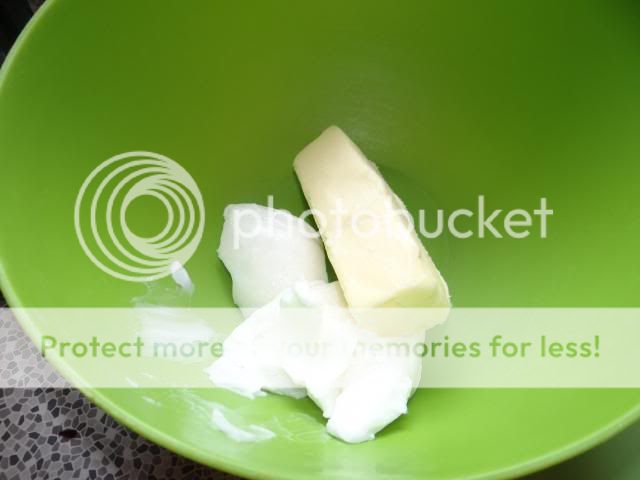
Using 8 Tablespoons of Butter and 6-8 Tablespoons of Vegetable Shortening, blend together.
Add the juice of one lemon.  Also the zest of the same one lemon.

Using the mixer put in about 1 lb of confectioner's sugar, mixing until very smooth looking.
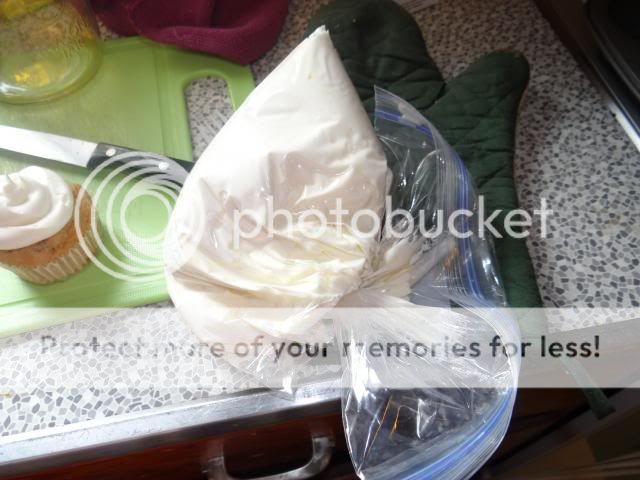
 Place into gallon bag.

Cut off a corner and move icing to that side for instant icing bag.  Ice the cupcakes away!


I know this was a terrible blog post, but seriously I am in some serious contractions right now.... hopefully we will have baby news soon.

Recipe:

Contraction or Labor Cupcakes
Cupcakes
1 fresh pineapple
4 tablespoons or so of dark brown sugar
1 box white cake mix
4 eggs
1 stick butter, melted
4 tablespoons of red raspberry leaf loose tea, or two tea bags of it
9 oz of boiling water

1.  Brew tea with boiling water, let sit one hour.
2.  Cut the pineapple into thin slices and cut small circles that fit into the bottom of lined cupcake pans.
3.  Sprinkle on brown sugar to pineapples in lined cupcake pans.
4.  In a mixing bowl, mix together eggs, cake mix and 1 stick melted butter, and filtered tea, mix together.
5.  Put batter on top of pineapple slices in lined cupcake pans.
6.  Bake at 350 degrees for 20 minutes
7.  Once cool, take out of cupcake pans and place in fridge to cool more.

Icing
1 stick butter, room temperature
6-8 tablespoons of vegetable shortening
1 lemon
1 lb of confectioner's sugar.

1.  In a mixing bowl blend together butter and vegetable shortening.
2.  Cut lemon in half and squeeze juice into icing mixture.
3.  Using a small grater, zest the outside of the lemon into the mixture.
4.  Blend together again and then slowly add confectioners sugar, mix until smooth.

To Ice the cupcakes place icing in gallon bag.  Cut a bottom corner off and push the icing to that corner.  Do a fun swirl or design on it.  Enjoy!


Monday, April 15, 2013

Gardening and Muffins

The garden is coming along splendidly.  We are very excited about our investment and the potentional payoff of it.  I has been difficult this year with the investment of the light shelves for seedlings.  Along with finally putting the last fence post in and then stapling a critter proof fence to the split rail.  We only needed to purchase 12 Kale plants so far.  Along with all of the seedlings we had to try something else new, hardening off seedlings.  This made me the most nervous of all.  We purchased a set of shelves and then mounted them to a simple board with wheels.  I was able to roll out the plants, several hours every day and then roll them back into the garage.


The first day the plants were out 8-12 then 8-2, then 8-4, then 8-8, then 24 hours a day.  This plan worked wonderfully since we had some beautiful weather last week.  I was able to plant 27 cabbage plants, and 18 Broccoli plants.  I then watered them with Miracle Grow Organic Plant Fertilizer.  Using a simple hose attachment I watered all the new plants, here is the one I purchased at our local true value .  It worked wonderfully for the fertilizer and the fruit tree spray.  We also purchased a new Cortland Apple Tree and planted it near the Golden Delicious from last year.  I sprayed down both trees very well, hoping to avoid the Apple tree scab that we had last year.

Here are the Cabbage Plants

The peas have seriously sprouted

Some of the broccoli is looking a bit shocked this morning, but not too bad, I have faith that it will live.

Onions and the Kale have sprouted, just waiting on the carrots.


This year we also put in a garden gate.  We just purchased a simple gate kit from Home Depot and installed it.  After a few tries we had it level and ready to go.  Hopefully this will help keep the critters out also.


Today is a big day for seedlings, today we are going to be starting our Tomatoe and Pepper plants, also we will be working on transfering some Lettuce starts to bigger pots.

Now onto the best part of the day, other than coffee, my new recipe for Oatmeal Cranberry Muffins, using Mary Jane Farm Baking Mix

1 cup milk
1 cup Quick Cooking Oats
1 egg
1/4 cup white sugar
1/4 cup canola oil
1 2/3 cup Baking Mix
1/2 cup apple juice infused dried cranberries

In a mixing bowl, mix up the milk, oats, egg, oil, sugar, and baking mix.  After mixed through fold in the dried cranberries.  Bake in a 350 degree oven for 20-25 minutes, or until a toothpick comes out clean.


Enjoy!

Sunday, March 10, 2013

Bagels and Badges

We are working on merit badges for Mary Jane's Farm Farmgirls today.  Writing and submitting, here are my some of my recent submissions.

Quilting-Intermediate
 

Heirlooms Forever - Beginner


Tatting - Beginner


Alot of people that know me, understand that the Farmgirls have changed my life and and how my family lives.  It is an amazing sisterhood of women that want nothing more than to help each other and make everything at home.  For more information about the Forums and all the great information on them go to http://www.maryjanesfarm.com/snitz/default.asp and for the Farmgirl Sisterhood http://www.farmgirlsisterhood.org/

As for today my family is in love with bagels.  I wanted to post our recipe for making homemade bagels in a very easy way.  They barely last 24 hours in our home.  You can make them by hand by mixing the ingredients and then letting rise until doubled.  But to save time I use the dough setting on my bread maker.

Homemade Bagels
3,5 cups Flour
4.5 teaspoons of yeast
3 Tablespoons of Sugar
1 Tablespoon Salt
1.5 Cups Hot water (110 degrees)

Boiling Water bath
1.5 Quarts of water
1.5 Tablespoons

Place Bagel ingredients into breadmachine in manufacturer's specified order.  Set to Dough setting and run.

This is what the dough looks like when it is done.
Make into 8 balls and then poke holes with thumb into center.  Stretch them out a bit and place on wax paper.  Let rise about 10 minutes.
Prepare the Boiling water bath in pot.
Using a slotted spoon give the syrup a stir in the boiling water bath.
(can you tell I made Spagetti Sauce)
Place the bagels into the water and let boil on each side for about 30 seconds.  Place onto Renoyld's Non-Stick Foil on a cookie sheet.  (I have also used a LATHERED with butter flavored crisco cookie sheet)

Bake at 350 degrees for 25 - 30 minutes.

After they are finished immediatly pull them from the foil and cut with a bread knife.  Enjoy!